Taking down the Christmas tree should feel like a fresh start. Instead, for most of us, it involves a trail of needles from the living room to the front door, a vacuum that sounds like it’s in genuine distress, and the vague sense that you’ll still be finding pine needles in March. Sound familiar?
The thing is, it doesn’t have to go that way. This guide walks you through everything: how to set up the space, what to have ready beforehand, how to get the tree out without shedding half of it on the carpet, and how to dispose of it properly once it’s gone.
TL;DR
- A dedicated tree removal bag is the most effective way to contain needles during transit.
- Laying a tarp around the base before you start catches needles that fall before the bag goes on.
- Remove all decorations and lights before touching the tree to prevent snagging and needle drop.
- Loosely binding the branches with string makes the tree narrower and much easier to manoeuvre.
- Most UK councils offer kerbside collection or drop-off points for real trees in early January.
- Needles can keep falling for several days after removal, so prompt disposal reduces secondary mess.
- Norway spruces drop needles far faster than Nordmann firs, so act quickly if that’s what you have.
Table of Contents
How to Remove a Christmas Tree Without Making a Mess
The most effective way to remove a Christmas tree without making a mess is to encase it in a tree removal bag before you move it anywhere. Lay a tarp around the base first to catch any needles that fall during the process. Work slowly, avoid shaking the tree, and carry it out in one smooth motion rather than bumping it through doorways.
That’s genuinely the core of it. Most of the mess happens in transit, that moment when you’re manoeuvring a dry, brittle tree through a doorframe and the branches catch on everything in sight. Prevention is much easier than clean-up.
A tree removal bag works by sliding up from the base of the tree (or lowering down over the top, depending on the design) so the tree is fully enclosed before it moves an inch. Any needles that drop during the walk-out land inside the bag, not on your carpet. It’s not glamorous, but it works remarkably well.
If your tree has been up since early December and is now quite dry, expect more needle drop than a fresher tree. Norway spruces are especially quick to dry out and shed; if that’s what you’ve got, don’t leave this too long. Nordmann firs hold their needles considerably better, but they’re not immune. Either way, encasing the tree properly before moving it is where most of the battle is won.
What Tools Do You Actually Need for a Clean Removal?
You don’t need much, but having the right things on hand makes a real difference. A tree bag and a tarp do most of the heavy lifting. A few extras help finish the job properly.
- Christmas tree removal bag, sized to fit your tree’s height
- Large tarp or heavy-duty plastic sheet
- Gardening gloves, pine sap is sticky and surprisingly persistent on skin
- Garden shears or secateurs for trimming lower branches if the tree is too wide for the doorway
- Vacuum cleaner with a hose attachment for corners and skirting boards
- Lint roller for picking up needles that cling to soft furnishings, rugs, or clothing
- Cable ties or string to loosely bind the branches before bagging, keeping the tree narrower
The lint roller is genuinely underrated here. You’ll find needles on cushions, on the sofa armrest, on your jumper. A quick roll over soft surfaces after the tree is out picks up what the vacuum misses. Takes thirty seconds and saves you finding rogue needles for weeks.
If your tree is particularly large or the branches are wide, a quick trim with garden shears makes it easier to get through a standard door frame without catching on every side. Just trim the very lowest and widest branches, you’re making it moveable, not reshaping it.
Step-by-Step Guide to Mess-Free Tree Removal
Here’s how to remove your Christmas tree without making a mess, from start to clean floor. Follow the steps in order and don’t skip the prep stages. That’s where most people get stuck.
A step-by-step process for removing a Christmas tree cleanly, from decoration removal through to final vacuuming.
Remove all decorations and lights
Take off every bauble, ornament, and strand of lights before touching the tree itself. Pack them into boxes or bags as you go. This prevents cables snagging on branches and causing needle drop, and means you’re not trying to untangle lights while balancing a dry tree. Give the lower branches a gentle check too; it’s easy to miss small hooks or clips down there.
Lay a tarp around the base
Spread a large tarp, old bed sheet, or plastic sheet around the base of the tree, covering as much of the surrounding floor as possible. This catches any needles that fall before the bag goes on. It also protects your carpet or flooring from the water tray or stand, which can leave marks. Keep the edges loose so you can fold them in later.
Loosely bind the branches
Use string or a few cable ties to gently gather the branches inward, working from the bottom up. This makes the tree narrower and far easier to manoeuvre through doorways. Don’t tie it too tightly. You’re just keeping the shape compact, not compressing it. This step alone prevents a huge amount of snagging and incidental needle drop.
Fit the tree removal bag
Slide the tree removal bag up from the base or lower it down from the top, depending on the bag design. Work slowly and keep the tree upright throughout. Once the bag is in place and secured, any further needle drop is contained inside. If you don’t have a tree bag, a large heavy-duty bin bag or plastic sheeting secured with tape works as a substitute, though it’s more fiddly to manage on the move.
Carry the tree out carefully
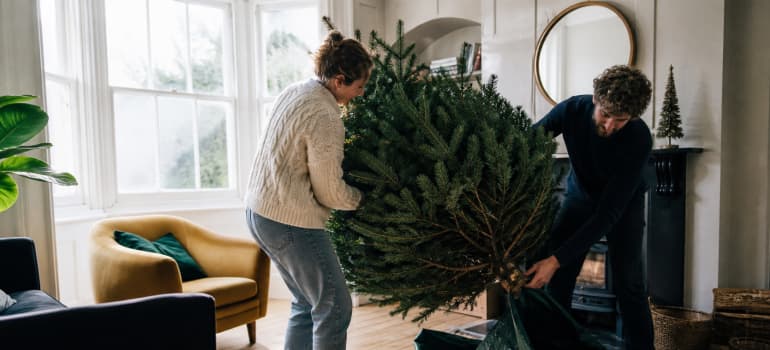
With a helper if possible, lift the tree and carry it out along your cleared path. Keep it upright rather than tilting it sideways; tilting shakes more needles loose. Take it slow through doorways. If you’re on your own, drag it gently along the tarp rather than lifting it fully, which gives you more control over the movement.
Fold and remove the tarp
Once the tree is out, carefully fold the edges of the tarp inward to contain any needles that collected on it. Carry the whole tarp outside and shake it over the garden or into a bin bag. This removes the bulk of the needle mess in one go without scattering them further across your floor.
Vacuum and do a final sweep
Run the vacuum over the area where the tree stood, using the hose attachment to get along skirting boards and into corners. Follow up with a lint roller on any upholstered surfaces nearby; needles cling to sofa arms, cushions, and jumpers far more than you’d expect. Give the hallway or exit path a quick sweep too. You’ll be surprised how clean the space looks with just these two steps.
How to Dispose of Your Christmas Tree Responsibly
The most responsible way to dispose of a real Christmas tree is through your local council’s collection service or a designated drop-off point. These schemes typically run through January and ensure the tree is chipped into mulch for public green spaces. Home composting smaller branches is also a good option if you have the space.
Once the tree is out of the house, you still need a plan for where it goes. Leaving it by the wheelie bin and hoping for the best isn’t really an approach. Most councils won’t take whole trees in general waste, and fly-tipping is illegal regardless of how festive the item in question is.
The good news is there are usually several legitimate options available, and most are free. It’s worth checking your local council’s website in the first week of January, as collection dates and drop-off locations are usually listed there.
- Kerbside collection, many UK councils offer a dedicated Christmas tree collection service in early January. Check your local authority’s website for specific dates and whether the stand needs to be removed first.
- Designated drop-off points, supermarket car parks, garden centres, and local parks often host collection points where trees are gathered and sent for chipping or composting.
- Household waste recycling centres, your local tip will accept real trees for recycling throughout January, though it’s worth calling ahead to confirm.
- Home composting, smaller branches can be stripped and added to a compost heap. Pine is slow to break down due to its resinous nature, so shredding first speeds things up considerably.
- Garden use, the trunk can be cut into logs for a fire pit or wood burner once it’s fully dried out. Branches can be laid over borders as temporary frost protection for vulnerable plants during cold snaps.
It’s also worth thinking about the environmental side. When a council chipping scheme takes your tree, it’s typically turned into wood chip mulch that goes back into public parks and green spaces, not landfill. That’s a genuinely good outcome for a tree that spent a month brightening up your living room. Home composting, even if slow, keeps organic matter out of the waste stream too. If you can choose an option that puts the tree back into the ground in some form, that’s the better call.
On the legal side, putting a Christmas tree in your general household waste bin is typically not permitted if the tree exceeds the size limits for your bin, which a full-sized tree almost certainly will. Leaving it on the pavement outside of a designated collection day could also attract a fine under litter regulations, depending on your local authority. It’s not something most councils pursue aggressively, but it’s worth doing things properly regardless.
If you’ve used a professional Christmas tree delivery and installation service this year, that kind of service takes care of everything from sourcing and setting up the tree to removing it once the season’s over, so you don’t have to think about any of this yourself.
Frequently Asked Questions
Can I use a regular plastic sheet instead of a tree bag?
Yes, a sturdy plastic sheet can do the job if you don’t have a dedicated tree bag. The challenge is keeping it in place as you move the tree, since it won’t have handles or a drawstring. Securing it with tape or cable ties helps. It’s a bit more fiddly, but perfectly workable. If the sheet tears mid-move, you’ve lost the containment, so use the heaviest gauge plastic you have.
How long can needles keep falling after the tree is removed?
Needles can continue dropping for several days after the tree is removed, especially if it was kept in a warm room and is quite dry. Getting the tree out of the house promptly and vacuuming the area thoroughly straight away reduces the secondary mess significantly. Any needles left on carpets or rugs can work their way deeper into the fibres over time, making them harder to remove later.
Is it better to remove a Christmas tree early or wait until Twelfth Night?
Tradition aside, from a practical standpoint, the longer a tree stays up in a heated home, the drier it gets and the more needles it is likely to drop during removal. If mess is your main concern, taking it down around the 5th or 6th of January rather than leaving it into mid-January generally means a cleaner process. A well-watered tree that has been up for a shorter time will hold its needles considerably better.
What should I do if needles are stuck in the carpet and the vacuum isn’t picking them up?
Pine needles can be stubborn in carpet fibres, particularly if they’ve been trodden in. Try working a stiff-bristled brush over the area first to loosen them before vacuuming. A rubber-soled squeegee or rubber glove dragged across the carpet surface creates static that pulls needles to the surface. For very fine needles, a lint roller pressed firmly onto the carpet can also lift what the vacuum leaves behind.
Book a clean and hassle-free Christmas tree removal
Enter your postcode to view our rates and availability in your area.
For questions about the services we offer visit our main site
Conclusion
Removing your Christmas tree without mess really comes down to two things: preparing before you move it, and containing it properly while you do. A tarp on the floor, a bag around the tree, a cleared path, and a vacuum ready to go, that’s most of the battle won before you’ve touched a branch. It takes a bit more thought than just dragging the thing out, but the difference in clean-up time is significant.
Do yourself a favour and make a note of what worked this year, so next January feels even easier. A tree bag stored in the loft, a reminder to book a council collection slot early, and a vow to keep the path clear, small things that make a real difference. You’ve got twelve months to prepare. That’s plenty of time.