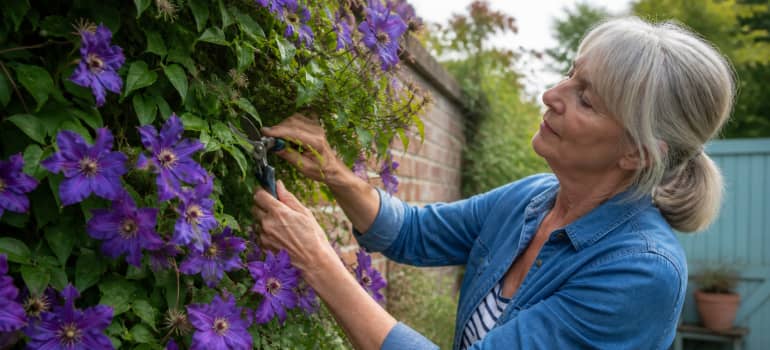
If you’ve ever stood in front of your clematis with secateurs in hand, completely unsure where to start, you’re not alone. Knowing how to prune clematis properly is one of those tasks that sounds straightforward until you’re actually doing it. Cut too much and you risk losing a season’s flowers. Cut too little and the plant turns into a tangled mess. It’s no wonder so many gardeners just leave it and hope for the best.
The good news is that clematis pruning really does follow a simple logic once you understand the basics. The key is knowing which type of clematis you’ve got, because that determines everything: when you prune, how hard you go, and what tools you’ll need. Get that right and the rest falls into place.
This guide walks you through each pruning group step by step, with clear timings, practical techniques, and the most common mistakes to avoid. By the end, you’ll know exactly what to do and when to do it.
TL;DR
- Identify your clematis pruning group (1, 2, or 3) before doing anything else.
- Group 1 clematis flower early and should be pruned right after flowering in late spring.
- Group 2 clematis need only a light prune in late winter to early spring.
- Group 3 clematis should be cut back hard to 30–50cm from the ground in late winter.
- Always use sharp, clean secateurs to reduce the risk of disease spreading.
- Never prune clematis in autumn — you’ll remove next season’s buds.
- Feed and water well after pruning to support strong, healthy regrowth.
Table of Contents
Understanding Clematis Pruning Groups
Before you touch your plant, you need to know which pruning group it belongs to. Clematis are divided into three groups based on when they flower and how they produce new growth. Prune at the wrong time and you’ll either remove the buds before they’ve had a chance to bloom, or you’ll end up with a woody, overcrowded plant that struggles year after year.
If you’ve lost the label (it happens to everyone), the easiest way to identify your group is to watch when it flowers. Early spring flowers usually mean Group 1. Big, showy blooms in late spring and again in late summer point to Group 2. And if it flowers vigorously from midsummer into autumn, it’s almost certainly Group 3.
- Group 1 (Early-flowering) — These clematis bloom in early spring, often on growth produced the previous year. They need minimal pruning and should only be tidied up after flowering, usually in late spring. Examples include Clematis montana and Clematis alpina
- Group 2 (Large-flowered hybrids) — These produce their main flush of large flowers in late spring to early summer, then often flower again in late summer. They need a light prune in late winter to early spring, before growth kicks off. Varieties like ‘Nelly Moser’ and ‘The President’ belong here
- Group 3 (Late-flowering) — These flower from midsummer onwards on new growth made that season. They respond brilliantly to a hard cut back in late winter. Clematis viticella and Clematis tangutica are classic examples
It’s worth writing down which group your plant belongs to the moment you find out. Stick a note in a pot nearby or jot it in a garden journal. Future you will be very grateful come February.
When Should You Prune Clematis for the Best Results?
The right time to prune clematis depends entirely on which pruning group it belongs to. Group 1 is pruned in late spring after flowering, Group 2 in late winter to early spring before growth begins, and Group 3 in late winter, cutting back hard. Timing your pruning to match the plant’s flowering cycle prevents losing buds and encourages the strongest possible growth.
Timing really is everything with clematis. Prune a Group 1 plant in February and you’ll cut off the buds that were quietly developing over winter, ready to burst open in spring. Prune a Group 3 plant too late in spring and it’ll spend energy on woody old stems instead of the fresh new growth that carries its flowers. It sounds fiddly, but once you’ve done it once or twice it becomes second nature.
Here’s a clear summary of when each group should be pruned and why:
| Pruning Group | Best Time to Prune | Why This Timing Works | |
|---|---|---|---|
| Group 1 | Late spring, immediately after flowering | Flowers on previous year’s wood; pruning after flowering gives the plant the whole season to develop new stems | |
| Group 2 | Late winter to early spring (February to March) | Flowers on both old and new wood; light pruning encourages a strong first flush without sacrificing buds | |
| Group 3 | Late winter (February to early March) | Flowers entirely on new growth; hard pruning stimulates vigorous new stems and bigger blooms |
One timing rule applies across all three groups: avoid pruning in autumn. It’s tempting to tidy things up before winter, but autumn pruning removes the buds that are already forming for next year. Leave it alone until the correct pruning window arrives.
Step-by-Step Pruning Guide for Each Group
Right, let’s get into the practical side. Each group has its own method, so work through whichever applies to your plant. The steps are straightforward, but doing them in the right order makes a real difference to the result.
Group 1: After-Flowering Tidy Up
- Wait until all flowers have fully finished, usually late spring.
- Look for any stems that are clearly dead, damaged, or very weak — these are the only ones that need to come out.
- Trim back any stems that have grown out of bounds, cutting just above a healthy pair of buds.
- Leave healthy green stems in place — they’re already building next year’s flower buds.
- Clear away any dead material from around the base and give the plant a good water.
Group 1 clematis really don’t need much attention. If yours has grown enormous (a mature Clematis montana can cover an entire fence), you can cut it back more firmly right after flowering. Just be patient — it may take a season to fully recover, but it will.
Group 2: Light Spring Prune
- In late February to early March, check the plant for any dead or damaged stems and remove them completely.
- Trace each stem down from the top and cut just above the first pair of plump, healthy buds you find.
- Identify the oldest, woodiest stems (usually darker and thicker) and cut roughly one-third of them back to about 30cm from the base.
- Gently untangle stems if needed and tie in any loose growth to its support structure.
- After the first flush of flowers in early summer, remove the spent flower heads to encourage the second flush later in the season.
Group 2 is the trickiest of the three because you’re trying to balance keeping old growth (which produces the early flowers) with encouraging new stems (which produce the later ones). The one-third rule is a good rule of thumb. Don’t stress about getting it perfect — these plants are more forgiving than they look.
Group 3: The Hard Cut Back
- In late winter, ideally February, cut every stem back to around 30–50cm from the ground.
- Cut just above a pair of healthy-looking buds — you’ll usually spot them low down on the stem.
- Remove all the cut material from around the base to keep the area tidy and reduce the risk of disease.
- If the plant is very old and has barely any buds near the base, cut as low as you can to the nearest visible bud rather than the ground.
- Once done, mulch around the base and water well.
This feels brutal the first time you do it. You’ll look at the sorry little stumps left behind and wonder if you’ve killed the plant entirely. You almost certainly haven’t. Group 3 clematis shoot up remarkably fast once the weather warms up, and by midsummer they’ll be covered in new growth and flowers.
What Tools Do You Need to Prune Clematis?
To prune clematis effectively, you need a pair of sharp bypass secateurs, a good pair of garden gloves, and a disinfectant solution to clean your tools between plants. Sharp, clean cuts reduce stress on the plant and lower the risk of fungal diseases spreading through your garden.
It doesn’t have to be expensive. What matters is that your secateurs are properly sharp. Blunt blades crush rather than cut, leaving ragged stems that are far more vulnerable to disease. If you’re not sure whether yours are sharp enough, try cutting a piece of paper. Clean slice? You’re good to go. Tearing and folding? Time to sharpen them.
- Bypass secateurs — the go-to tool for clematis stems. They make clean, precise cuts without crushing the stem.
- Long-handled loppers — useful for thicker, woodier stems on older Group 1 plants, especially those growing high up.
- Garden gloves — some clematis stems are surprisingly rough, and a good pair protects your hands while giving you a firm grip.
- Disinfectant solution — a diluted mix of household disinfectant in a small bucket is all you need. Dip your secateur blades between plants to prevent spreading fungal spores or bacteria.
- Soft garden twine — helpful for tying in stems after pruning, particularly for Group 2 plants that need their remaining growth secured to a trellis or fence.
Get into the habit of cleaning your tools before and after each session. It takes all of ten seconds and genuinely makes a difference, especially if you’re moving between different plants in the garden.
Common Pruning Mistakes to Avoid
Even experienced gardeners get this wrong sometimes. Clematis pruning mistakes are surprisingly easy to make, but most of them are just as easy to avoid once you know what to look out for.
- Pruning all clematis the same way — This is probably the most common mistake. Treating a Group 1 plant like a Group 3 and cutting it hard in February will remove all the buds that were forming on last year’s wood. Always identify your group first
- Pruning in autumn — It feels logical to tidy up at the end of summer, but autumn pruning removes developing buds. Hold off until the correct window in late winter or post-flowering, depending on your group
- Not pruning Group 3 hard enough — Many gardeners are nervous about cutting back too far and end up leaving long stems. Group 3 clematis actually need that hard cut to perform well. Leaving too much old wood leads to bare stems at the bottom and flowers only at the top
- Using blunt tools — Crushing stems with blunt secateurs leaves wounds that take longer to heal and invite disease. Sharpen or replace your blades before the pruning season starts
- Ignoring dead or diseased stems — Leaving dead wood in the plant gives fungal diseases somewhere to take hold. Remove it cleanly and dispose of it rather than leaving it around the base
- Forgetting to tie in after pruning — Once you’ve pruned, new growth will start shooting up quickly. If it isn’t guided onto a support structure early, stems tangle around each other and become much harder to manage later in the season
What to Do After Pruning Clematis
You’ve done the hard work. Now give the plant a decent chance to make the most of it. What you do in the weeks right after pruning can genuinely influence how well your clematis flowers that season.
Start by guiding new stems onto their support as they appear. After a hard prune, particularly with Group 3, you’ll be surprised how fast shoots emerge. Tying them in early — to a trellis, obelisk, or fence — stops them tangling into a mess and makes the whole plant look far more presentable by midsummer. It takes a minute or two each week and it really is worth it.
A handful of general-purpose balanced feed worked into the soil around the base will help new growth get going. As flower buds start to show, switching to a high-potash feed encourages stronger blooms. And keep the soil around the base consistently moist, especially if the plant grows against a wall where rainfall rarely reaches. A layer of garden compost or well-rotted bark mulch, kept clear of the stems, helps hold that moisture in while keeping the roots cool — which clematis love.
If you’d rather leave the regular upkeep to someone else, a professional garden maintenance service takes care of the ongoing work throughout the season so your plants get consistent attention whenever they need it.
Get expert help keeping your clematis and garden in great shape
Enter your postcode to view our rates and availability in your area.
For questions about the services we offer visit our main site
Conclusion
Pruning clematis doesn’t have to feel like a guessing game. Once you know your plant’s group, the whole process becomes logical and even satisfying. The right cut at the right time is genuinely one of the simplest ways to transform a tatty, overgrown climber into something that stops people in their tracks each summer.
Stick to the timing guidelines, keep your tools sharp, and give the plant a bit of post-pruning support and you’ll notice the difference. Consistency is what gets results year after year — and once it clicks, you’ll wonder why it ever felt so daunting.