There’s something genuinely satisfying about a garden path lined with bright white decorative stones. They catch the light, make borders look neat, and give the whole space that polished, intentional feel. But if you’ve had them for more than a season or two, you already know the downside. Those crisp white stones don’t stay white for long.
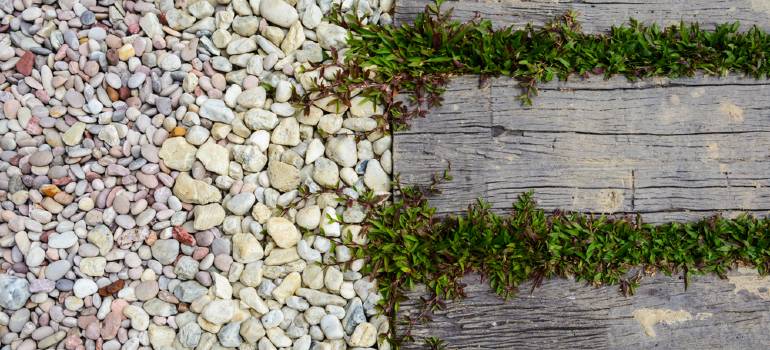
Moss creeps in. Algae turns them green. Autumn leaves leave brown tannin stains behind. And somehow, what started as a feature becomes a bit of an eyesore. The good news is that cleaning garden stones properly, and keeping on top of it throughout the year, makes a bigger difference than most people expect.
This guide covers what’s causing the problem, how to fix it, and how to stay ahead of it without spending every weekend scrubbing.
TL;DR
- White decorative gravel collects dirt, algae, moss, and leaf stains across every season.
- UK seasonal weather affects your stones differently, so your cleaning routine needs to adapt.
- Manual scrubbing combined with a garden hose gives good results for most stone types.
- Pressure washers work well but must be used carefully to avoid scattering or damaging stones.
- Harsh chemicals like bleach can discolour or degrade decorative gravel — stick to pH-neutral solutions.
- A simple seasonal maintenance calendar prevents heavy build-up and keeps cleaning manageable.
- Treating moss and algae early in spring stops them from becoming a much bigger problem later.
Table of Contents
What Does Each Season Do to Your Garden Stones?
Each UK season brings a different type of mess to decorative garden gravel. Autumn stains with leaf tannins, winter pushes soil and debris between the stones, spring triggers moss and algae growth, and summer coats the surface with dust and pollen. Understanding what’s happening and when is the first step to dealing with it effectively.
The UK doesn’t offer stable, predictable weather, and your garden stones feel every bit of it. Once you understand what each season is doing to your gravel, it’s a lot easier to tackle it at the right moment rather than play catch-up on a year’s worth of neglect.
- Autumn leaf fall – Fallen leaves break down on top of your gravel and release tannins, leaving behind stubborn brown staining. If they sit long enough, the moisture trapped underneath also encourages moss to take hold.
- Winter rain and frost – Heavy rainfall washes soil and debris into the stones, pushing dirt deep between the pieces. Frost can also cause surface cracking on softer stones, giving grime more texture to cling to.
- Spring moisture and warmth – This is prime growing season for moss and algae. The combination of leftover winter damp and rising temperatures creates ideal conditions for green growth to spread quickly across white gravel.
- Summer dust and pollen – Drier weather brings dust, pollen, and bird droppings, all of which settle onto the stone surface and create a dull, yellowish film over time.
Each of these builds on the last if you ignore it. A few leaves left in October can mean a proper green mossy mess by March. Staying one step ahead, season by season, is genuinely the most effective approach.
How to Clean Garden Stones: The Essential Guide
To clean garden stones effectively, rinse them first with a garden hose to shift loose debris, then apply a pH-neutral detergent and scrub with a stiff brush before rinsing thoroughly. This combination removes dirt, light staining, and surface algae without damaging the stone or disrupting the surrounding soil.
It’s worth being honest here: getting white decorative gravel back to its original brightness takes a bit of effort, especially if it’s been neglected for a while. But the process itself isn’t complicated. You don’t need specialist equipment or expensive products. What you do need is the right method done consistently.
The key is to use gentle, pH-neutral cleaning solutions. Strongly acidic or alkaline products can etch into the surface of the stone, dull its finish, or cause structural damage over repeated use. A mild washing-up liquid diluted in water works surprisingly well for a general clean. For tougher algae or green staining, look for an eco-friendly stone cleaner from your local garden centre, something designed specifically for outdoor use on paving or gravel.
Here’s a straightforward step-by-step to follow:
A simple process to clean white decorative garden stones using basic tools and a pH-neutral detergent.
Gather your tools
You’ll need a stiff-bristled scrubbing brush, a garden hose with a spray nozzle, a bucket, and a mild pH-neutral detergent or diluted eco-friendly garden stone cleaner. Having everything to hand before you start makes the job much smoother.
Rinse the stones with your garden hose
Give the whole area a good rinse to remove loose dirt, dust, leaf fragments, and anything sitting on the surface. Use a decent spray pressure, but don’t go too close or you’ll scatter the gravel. This step alone shifts more than you’d expect.
Apply your detergent and scrub
Dilute your chosen detergent in a bucket of water and pour or spray it over the stones. Work in sections if you have a large area. Use your stiff brush to scrub the surface, working the solution down between the stones to target any algae or ingrained dirt.
Rinse thoroughly
Once you’ve scrubbed each section, rinse it well with the hose to remove all traces of detergent. Leftover soap residue can attract more dirt and cause the stones to look dull. If a section still looks stained, repeat the scrub and rinse once more.
Leave to dry and inspect
Let the stones dry completely before judging the results. Wet gravel often looks darker than it actually is. Once dry, check for any remaining green patches or staining and spot-treat if needed. A dry sunny afternoon is the best time to do this job.
Which Tools Actually Work for Cleaning Garden Stones?
A garden hose with a spray attachment handles regular maintenance well, manual scrubbing tackles stubborn patches, and a pressure washer speeds up deep cleans on large areas. The right tool depends on the condition of your gravel and how much coverage you’re dealing with.
Not all tools are equal, and the wrong choice can set you back further than doing nothing at all. Here’s a practical breakdown of what works, what to be careful with, and what to reach for when.
- Garden hose with spray nozzle – Great for rinsing away loose debris and giving stones a quick freshen-up after bad weather. It’s the gentlest option and safe for regular use. Won’t shift ingrained algae or staining on its own, but it’s the essential starting point for any clean.
- Stiff-bristled scrubbing brush – The real workhorse. A brush lets you physically work the cleaning solution into gaps between stones. Choose one with a long handle to save your back. It takes effort, but it gives you the most control over what’s being cleaned and how much pressure you’re applying.
- Pressure washer – Covers ground quickly and does an impressive job on heavy algae or long-neglected gravel. The downside is that it scatters stones if you go too close or use too high a setting, and it can blast away the fine top layer of softer stone types. Keep the nozzle at least 30cm away and use a wide fan setting rather than a concentrated jet.
- Garden sprayer – Useful for applying moss and algae treatment products evenly across a large area. Not a cleaning tool in itself, but a great companion when you’re applying preventative treatments in early spring or late autumn. Much quicker than a watering can for covering a wide spread of gravel.
- Leaf blower or rake – Often overlooked, but clearing dry leaf debris before you wet anything down makes the whole wash far more effective. Wet leaves turn to mush and smear across the stones, making the job harder. A quick blow or rake first saves you time later.
For most people with a standard decorative gravel path or border, a hose, a brush, and a mild detergent will do the job well. Save the pressure washer for bigger annual cleans or particularly stubborn patches. It’s a treat, not an everyday tool.
Common Mistakes to Avoid When Cleaning Garden Stones
It’s easy to go in with the best intentions and end up with stones that look worse or are actually damaged. A few very common mistakes account for most of the problems people run into when they try to clean garden stones.
- Using a pressure washer too close – Holding the nozzle too near the stones blasts them out of position and can chip or erode softer stone types. You can end up with a patchy, uneven surface that looks worse than before. Always keep your distance and use a fan spray setting.
- Applying bleach or harsh chemicals – Bleach might seem like a quick fix for green staining, but it can cause white decorative stones to go yellow or grey over time. It also kills off soil life beneath the gravel and can damage surrounding plants. Stick to pH-neutral or plant-safe products.
- Skipping the initial rinse – Jumping straight to scrubbing with detergent without rinsing first just pushes loose dirt around and grinds it deeper into the stone surface. Always rinse first to lift what’s sitting on top before you start scrubbing.
- Ignoring seasonal maintenance – Leaving the stones untouched for a full year means algae and moss have had months to establish a proper grip. What could have been a quick spring treatment turns into a full afternoon of hard scrubbing. Little and often really does make a difference.
- Cleaning in direct summer sun – If you apply a cleaning solution in bright sunshine, it can dry before you’ve had a chance to rinse it off properly. This leaves residue on the stones, which dulls their appearance and can cause further staining. Pick an overcast day or work in the shade where possible.
Honestly, most of these are easy to avoid once you know about them. The bleach one catches people out the most, because it seems logical. But white stones and bleach aren’t a happy combination in the long run.
How Do You Keep Garden Stones Clean All Year Round?
The most effective approach is a simple seasonal routine: clear leaves in autumn, do a light rinse through winter, apply moss treatment in early spring followed by a full scrub, then hose down in summer as needed. Staying on top of each season’s specific problem stops heavy build-up from taking hold.
Cleaning is one thing. Keeping them clean is the real challenge. But a simple seasonal routine doesn’t take much time at all, and it stops you from ever facing that full-scale scrubbing job more than once.
Think of it like car maintenance. A quick wash every few weeks keeps things manageable. Leave it for six months and suddenly you’re dealing with something that takes an entire afternoon and a lot more effort.
Here’s a seasonal maintenance approach that works well for decorative garden gravel in the UK:
- Autumn (September to November): Rake or blow leaves off the gravel regularly, especially after windy spells. Give the stones a good hose-down once the main leaf fall is over, around late October or early November, to remove tannin residue before it stains.
- Winter (December to February): Inspect after heavy rain and remove any soil or debris washed onto the stones. A light rinse on a mild day keeps things from building up. Don’t scrub in freezing conditions, as water left on stones overnight can freeze and cause surface damage.
- Spring (March to May): This is your most important maintenance window. Apply an eco-friendly moss and algae treatment early in March before growth gets established. Follow up with a full scrub and rinse in April once any treatment has done its job.
- Summer (June to August): Hose down after dry spells to remove dust and pollen. Check for bird droppings and spot-clean where needed. This is also a good time to top up any areas where gravel has thinned out — a good depth of stones helps reduce weed and moss growth.
Building even a loose seasonal habit around your gravel genuinely transforms how much effort each clean takes. You’ll find yourself doing ten-minute jobs rather than two-hour ones. If you’d rather hand that routine off entirely, a professional garden maintenance service takes care of the regular upkeep so your outdoor space gets the attention it needs throughout the year, without it falling on your to-do list.
Frequently Asked Questions
How often should I clean my garden stones?
A full scrub and rinse twice a year, in late autumn and early spring, is usually enough for most gardens. Add a quick hose-down in summer if the stones look dusty and rinse after leaf fall in autumn. If you have trees nearby or a shaded, damp area, you may need to treat for moss and algae more frequently, perhaps three or four times a year.
What natural remedies can help prevent moss growth on stones?
White vinegar diluted in water can help discourage moss when applied to dry stones on a dry day, though it needs repeating regularly and isn’t as effective as a purpose-made treatment. Improving drainage around the gravel area and making sure stones aren’t permanently shaded can also reduce moss growth significantly, as moss thrives in damp, low-light conditions. Keeping the gravel layer at least 5cm deep also helps.
Why have my white garden stones turned yellow or orange?
Yellowing or orange discolouration on white gravel is usually caused by iron oxide, essentially rust, from minerals in the soil or water reacting with the stone surface. It can also happen after repeated use of harsh cleaning chemicals. A diluted citric acid solution can help lift this type of staining, but it needs to be rinsed away thoroughly and shouldn’t be used too frequently as it can affect the stone surface over time.
Keep your garden stones and outdoor spaces looking their best all year round
Enter your postcode to view our rates and availability in your area.
For questions about the services we offer visit our main site
Conclusion
White decorative garden stones are one of those features that reward attention. When they’re clean, they genuinely lift the whole look of a garden. When they’re not, they become a constant background irritation. The key takeaway is that knowing how to clean garden stones is only half the job. Knowing when to clean them, and what each season is about to throw at them, is what keeps the effort manageable.
A little work done at the right time beats a huge effort done too late. Get into a loose seasonal rhythm, avoid the common mistakes, use gentle products, and your white gravel will stay looking sharp for years rather than fading into a greenish, muddy memory of what it once was.